
We Need More Humans Walkthrough
A location-by-location run from Population 23 to the 27,000-person mop-up.
This walkthrough is the Normal-mode spine of We Need More Humans. It is not a second-by-second script — the skill tree is linear, so your node order will look like everyone else’s. It is a map of how the planet gets denser, when Evolution starts paying rent, and why the last hours feel slower than the first village. Pair it with getting started if you have not abducted anyone yet, and with how to complete when you only care about the credits.
ImCade’s public playthrough (embedded above, after this intro) is a demo-era recording, but the loop matches the September 2026 full release: abduct, spend, travel, evolve, mop up. The full game adds more locations, more evolutions, extra modes, and ship customisation on top of that loop.
Act 1 — Desert village (population ~20–30)
The opening map is a sandy settlement with flat-roof houses and a wooden Population sign. Steam’s own screenshot shows Population 23 and a 6.0s timer. Humans are worth about $2. Buy Beam Capacity, then radius or value. Ignore every node that costs more than a coffee. Sweep, do not hover. When the sign hits zero, the game used to pop a Location Cleared notice (added in a 4 June 2026 demo patch) and send you on.
This act exists to teach the beam. If you already understand controls, you will leave in a handful of rounds.
Act 2 — Snow town (population hundreds)
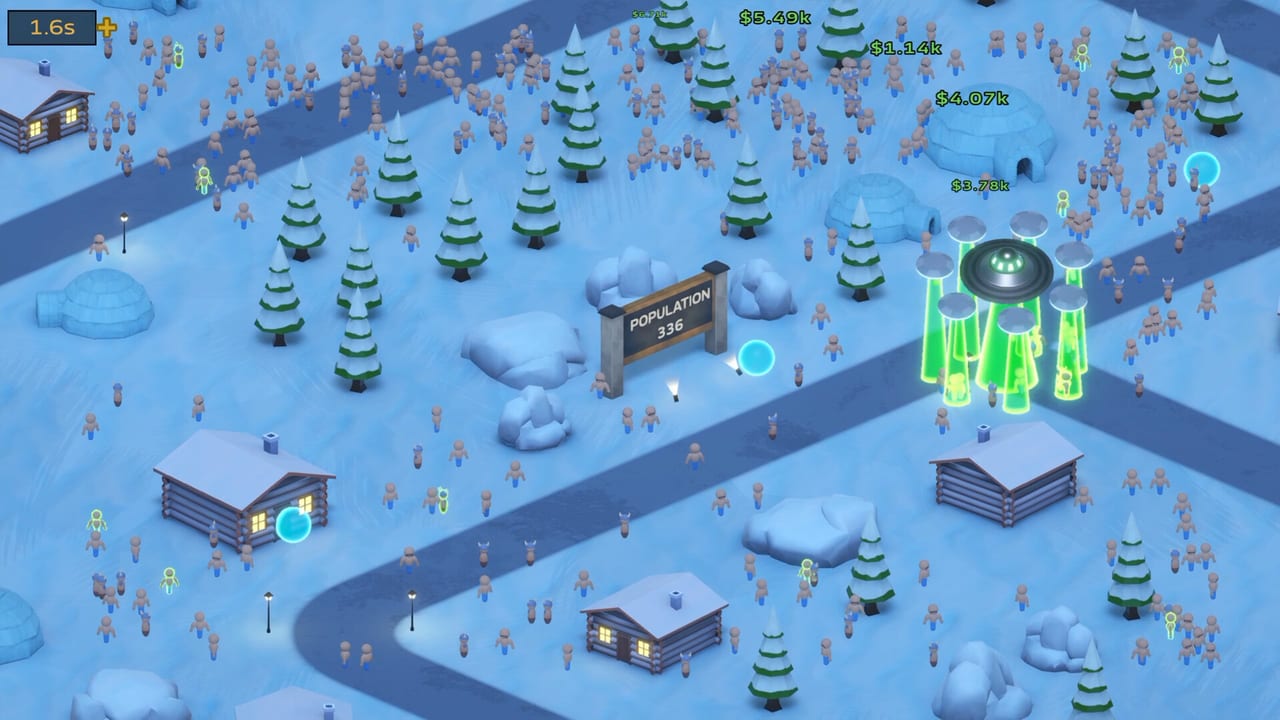
Cabins, igloos, pine trees, blue-trouser people on ice. One gallery shot shows Population 336, a 1.6s clock, and a saucer with four extra green arm beams. That timer is a warning: if you skipped Round Time, this biome will feel like a slap. Buy time, then arms when they appear. Cyan orbs sit on the snow — fly through them. Money popups in this range are thousands, not tens.
The early game build is written for Acts 1–2. Do not start Evolution-maxing until the cheap capacity nodes are gone.
Act 3 — Packed suburb (population thousands)
Grid roads, lawns, a church, a gazebo, a Population 5,675 sign, and a long cyan beam cutting the neighbourhood. Timer around 16.9s. Dollar ticks jump into the hundreds of thousands and even $1.27M on a single scoop if you have been buying value and Evolution. Red-shirt crowds fill every yard. This is the first map where pathing through gizmos matters as much as raw vacuuming.
If the beam still feels like a drinking straw, you under-bought radius. Check the upgrade priority list. If humans have already changed body type, jump to the evolution tier list so you know whether you are looking at base villagers, larger bodies, or the later ninja / cow / pig jokes.
Act 4 — Daytime dense city (population ~27,000)
Streets vanish under a purple-blue crowd. A Steam shot shows Population 27,684, 17.6s, and million-dollar pops around a glowing special effect. Black-hole circles sit on corners. FPS can dip here — several reviews mention hitching when a new wave of humans spawns. Lowering nothing in-options (the game is light) will not fully fix a 100,000-entity flex; just expect a stutter and keep the beam moving.
This is where Instant Abduction and arm radius start to feel mandatory. The skill tree page shows how those clusters sit on the right-hand hexagons.
Act 5 — Neon night city (population ~14,000+, billions of dollars)
Palm trees, glowing roofs, crop-circle pads, pyramids, a meteor streak, and payouts like $4.68B. Population on one screenshot is 14,388 — fewer people than the daytime crush, but each body is absurdly expensive. Timer 23.1s. This is the “numbers go brrr” act reviewers either love or call soulless. Route the ship across pads and crowds. Black holes will steal orbs if you treat the map like a straight lawnmower.
Cosmetic ships do not add stats. If you unlocked a new saucer and the beam still feels identical, that is intended. Spend the cash on remaining tree nodes, not on hoping the paint job abducts faster.
Mop-up and the lawnmower finish
When the last upgrades click, playthroughs show a mass-abduction flourish — the ship mows the remaining population in one pass and the location clears. ImCade and other creators hit that beat after finishing the visible tree. You may not need the final node; several recordings finish a map with one upgrade unbought. Then you either roll into extra modes or sit on the Game Complete screen.
The how to complete page covers that last grind, Endless, and why the finale feels slow once population stops rising. The late game build is the shopping list for Acts 4–5.
What the full release added on top of demo walkthroughs
Matt Cole’s June 2026 post promised more upgrades, more locations, more evolutions, game modes, and customisation. The 1 September 2026 launch shipped that list. Demo recordings still teach the beam, but they under-count maps and modes. If a YouTube video ends in a small town, keep playing — the wiki’s locations atlas is based on the Steam gallery for the full build.
Use the updates hub if you are coming back from the May demo and want the changelog rather than another abduction lap.
Frequently Asked Questions
Quick answers to the most common questions.
How many maps are there?
The full release adds more than the demo. Steam gallery biomes include desert, snow, suburb, dense city, and neon night. See locations for the atlas.
When should I buy Evolution?
As soon as it is the cheapest useful node after capacity and radius. The evolution tier list shows how bodies and payouts change.
Why is a later map easier than an earlier one?
Population and payouts are not a straight staircase. Neon cities can have fewer people than a daytime crush, but each human is worth far more.
Can I skip a location?
No. You clear, then travel. The tree is linear and so is the world tour.
Is this walkthrough for extra modes?
It is the Normal spine. Extra and Endless are on how to complete.